macOS: Installing Visual Studio Code
Overview
Visual Studio Code (a.k.a VS Code) is a popular source code editor that runs on Windows, Mac, and Linux. It features built-in support for a variety of software languages as well as extensions for languages such as Python.
Follow this guide to acquire, install, and configure VS Code as a Python source code editor. The guide assumes that you have previously installed Python 3.x.
1.0 Download and install Visual Studio Code
Visual Studio Code serves as the default source code editor for SI 506. The teaching team utilizes VS Code as a teaching tool during lectures, labs, demos, in-class exercises, etc. We recommend highly that you install it in order to synch your local development environment with that of the teaching team.
Alternative products exist in the marketplace. Besides Python’s own IDLE app, popular editors and integrated development environments (IDEs) include PyCharm, Sublime Text, and the Eclipse Theia cloud (i.e., in-browser) and desktop IDE. Note that to use Jet Brain’s PyCharm you must apply for a free student license.
❗ Atom users beware: the Github team retired the text editor on 15 December 2022 in favor of VS Code and Github Codespaces.
You may prefer to run a different source code editor than VS Code. You are free to do so. However, the teaching team will assume that you know how to install, configure, and maintain your preferred source code editor or IDE without the need of our assistance. Our focus is VS Code.
1.1 Download Visual Studio Code
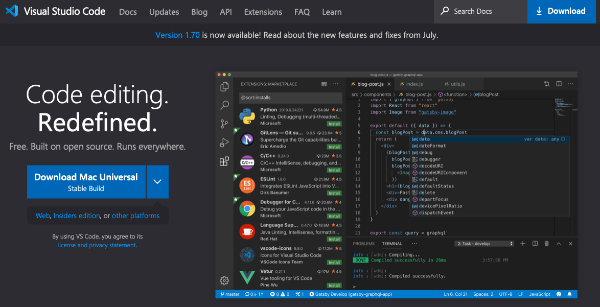
Visit the VS Code website. Your operating system version should have been detected on the page load and the link to the VS Code stable build displayed as a blue button. Click the button to download the install package.
1.2 Install Visual Studio Code
Open the Finder and locate the archive file VSCode-darwin-stable.zip in your Downloads directory
(assuming, of course, that your downloads are saved to this directory location). Double-click the
file to uncompress the contents. Visual Studio Code.app should now appear in your Downloads
directory. Drag Visual Studio Code.app to your Applications directory.
⚠️ You must move the Visual Studio Code.app to your Applications directory. Failure to do so will lead to unexpected VS Code behavior.
💡 Once you’ve added Visual Studio Code.app to your Applications directory, you can drag
the blue program icon to the dock to simplify accessing the application.
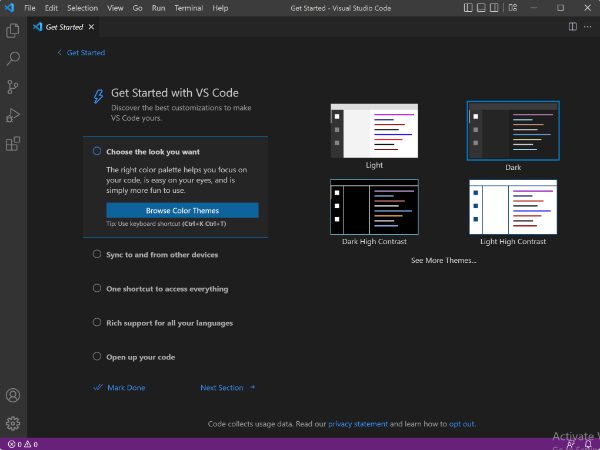
Click the VS Code icon to the start the program and display its welcome page.

💡 VS Code’s user documentation is both helpful and friendly. Commence with the Getting Started section of the documentation, in particular the user interface overview. The VS Code team has also produced a set of introductory videos that are worth watching.
2.0 Extensions
VS Code is highly customizable. It features an extensions marketplace that allows users to install Microsoft extensions as well as third-party contributions to enhance the development environment. See the VS Code Extension Marketplace page for more information on how to search, install, and manage extensions.

2.1 Install select extensions (required)
On the left-side of the VS Code user interface is positioned a vertical activity bar containing the following icons arranged vertically from the top:
-
File explorer (two layered docs icon)
-
Search (magnifying glass icon)
-
Source Control (three dots connected by 2 lines icon)
-
Debugger (triangle overlayed with a bug)
-
Extensions (three connected tiles and one disconnected tile)
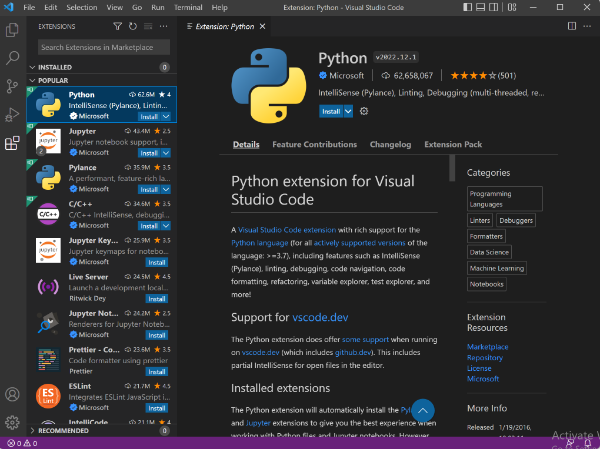
Click the “Extensions” icon to open the extensions panel. In the search box type the name of the extension (e.g., “Python”). After the extension is retrieved, click the extension’s blue “Install” button. Repeat the search/install procedure to add the following extensions:
| No. | Extension | Author | Description | Installation Notes |
|---|---|---|---|---|
| 01 | Python | Microsoft | Provides rich support for the Python language, including intellisense, code formatting, linting, debugging, and other useful features. | Search string: Python. Pylance along with a number of Jupyter-related extensions are also installed when you add the Python extension. |
| 02 | Ruff | Astral Software | Ruff is an opinionated code formatter and linter that both highlights syntax issues and ensures that your code adheres to the Python Community’s PEP 08 style guidelines. | Search string: Ruff. |
| 03 | Markdown Emoji | Matt Bierner | Adds emoji syntax support to VS Code’s Markdown preview and Jupyter notebook Markdown cells. | Search string: Markdown Emoji. |
| 04 | Markdown PDF | yzane | Converts Markdown files to PDF, HTML, PNG or JPG file formats. | Search string: Markdown PDF. |
| 05 | Rainbow CSV | mechatroner | “Colorizing” extension that highlights comma-separated (.csv) and tab-separated values when you open a CSV or TSV file that uses a comma, semicolon, or pipe delimiter. | Search string: Rainbow CSV. |
| 06 | Trailing Spaces | Shardul Mahadik | Highlights extra and unnecessary trailing spaces found in your code. Besides manual clean up, the extension provides an easy means to delete trailing spaces found in the file that you are currently editing. | Search string: Trailing Spaces. |
| 07 | vscode-icons | VSCode Icons Team | Delightful eye candy that provides an extended set of directory and file icons that simplify directory and file type recognition. | Search string: vscode-icons. After installing vscode-icons you will be prompted to set the file icon theme to VSCode Icons in the dropdown window. You may need to also activate the extension by clicking a button in a pop up message (appears bottom right). |
| 08 | Even Better TOML | tamasfe | Provides enhanced TOML (Tom’s Obvious, Minimal Language) support, including syntax highlighting, folding, symbol tree and navigation, renaming, formatting, autocompletion, and validation. | Search string: Even Better TOML. |
2.2 Disable/uninstall the code runner extension
Occasionally, a student installs the code runner extension. Doing so changes the behavior of VS Code’s terminal pane. When running a Python file in VS Code with the code runner extension enabled, the output tab rather than the terminal tab is privileged in the run pane. There is nothing wrong with this behavior; it results in a different run pane view than what the teaching team will display during lectures and office hours.
If the code runner extension is not required for another class, work or project we recommend that it be disabled or uninstalled. Be sure to restart VS Code after disabling or uninstalling the extension.
Otherwise, the workaround is to right-click on the Python file and select “Run Python File in Terminal”. A terminal session will be invoked, the file run, and the run pane will open to the Terminal tab.
3.0 Settings
3.1 Enable Execute in File Dir
Later in the semester you will read from and write to files stored locally on your
file system by running Python files from inside VS Code. In order to avoid triggering a
FileNotFoundError you must enable VS Code’s “Execute in File Dir” terminal setting.
Do the following:
-
From the horizontal top menu select Code > Settings > Settings.
-
In search box type: “Terminal: execute”.
-
Check the settings under Extensions > Python.
-
Enable the Python > Terminal: Execute In File Dir setting by clicking on the checkbox.
-
Close the settings tab

3.2 Change Ruff Linter/Formatter line length
The Ruff team defaults to a maximum line length of
88 characters for linting and formatting. Many
developers, including Team 506, prefer a line length of 100 characters. This preference requires
that you override the Ruff extension’s default line length.
❗ SI 506 auto graders will test your code assuming a line length of 100 characters.
Ruff default settings can be overridden using a TOML config file named either
pyproject.toml,ruff.toml or .ruff.toml. You can find the SI 506 pyproject.toml file in the
Canvas Files config/ directory. Download pyproject.toml locally and place it in your “root”
SI506/ directory.
💡 During the first day of class we will have you create the following directory structure using
Terminal.app or a terminal emulator of your own choosing such as
iTerm2 and select Unix commands.
Documents/
  umich/
    courses/
      SI506/
        assignments/
        lessons/
        pyproject.toml        <--- locate file here
        SI506.code-workspace
3.3 Enable Bracket Pair Colorization
This useful setting colorizes matching brackets and braces as an aid to identification.
⚠️ This setting was formerly a community-provided extension. If you previously installed this extension it has now been deprecated and should be uninstalled in favor of enabling the new setting as described below.
Do the following:
-
From the horizontal top menu select Code > Settings > Settings.
-
In search box type: “Bracket Pair”.
-
Check the settings under Text Editor.
-
Enable the Editor > Bracket Pair Colorization: Enabled setting by clicking on the checkbox.
-
Close the settings tab

4.0 Check the installation
On the “Get Started” page under “Start” click the “New file” link.
Do the following:
-
Select the dropdown “Text File” option.
-
Click the “Select a language” link.
-
Select the dropdown “Python” option (requires scrolling)
-
Write the following line of code:
print('I just installed VS Code.') -
From the taskbar select File > Save As…
-
Name the file “scratch.py” and save it to your
/Documentsdirectory. 💡 The extension.pyindicates that this is a Python file. -
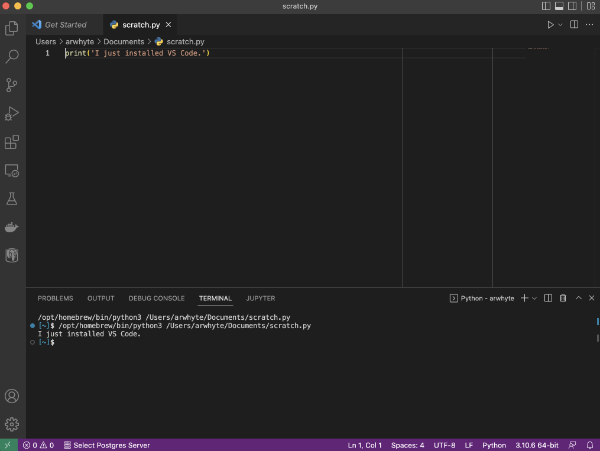
Click the triangle run button (top right of editor pane) to run
scratch.py. VS Code will start a terminal session, run your file, and print the string “I just installed VS Code” in the terminal pane.
Appendix A. Managing extensions
VS Code makes it easy to manage your extensions. You can install, disable, update, and uninstall extensions through the activity bar extensions view, the Command Palette (commands have the Extensions: prefix) or command-line switches.
A.1 View installed extensions
Click on the activity bar extensions icon. The extensions view will be displayed. Click on the three dots ("…") to the right of the “EXTENSIONS” heading. Select “Show Enabled Extensions.” The extension(s) that you have installed will be listed.
A.2 Recommended/Popular extensions
Again click on the three dots ("…") to the right of the Extensions heading, and select “Show Recommended Extensions.” You will be presented with a number of recommended extensions which you can install once you become more familiar with VS Code, Git, Github and other technologies and platforms.
A.3 Uninstall/Disable extensions
To uninstall an extension, click the extensions icon in the activity bar. Scan your “enabled” extensions and then click the gear icon to the right of the extension entry. Choose “Uninstall” from the drop-down menu. This will uninstall the extension and prompt you to reload VS Code.
If you don’t want to permanently remove an extension, you can instead disable it temporarily by clicking the gear icon and selecting “Disable”. You can disable an extension either globally or just for the current workspace. You will be prompted to reload VS Code after you disable an extension.
If you need to disable all installed extensions, click on the three dots ("…") to the right of the Extensions heading and select “Disable All Installed Extensions”. Extensions remain disabled for all VS Code sessions until you re-enable them.